Call:
0577-85859117
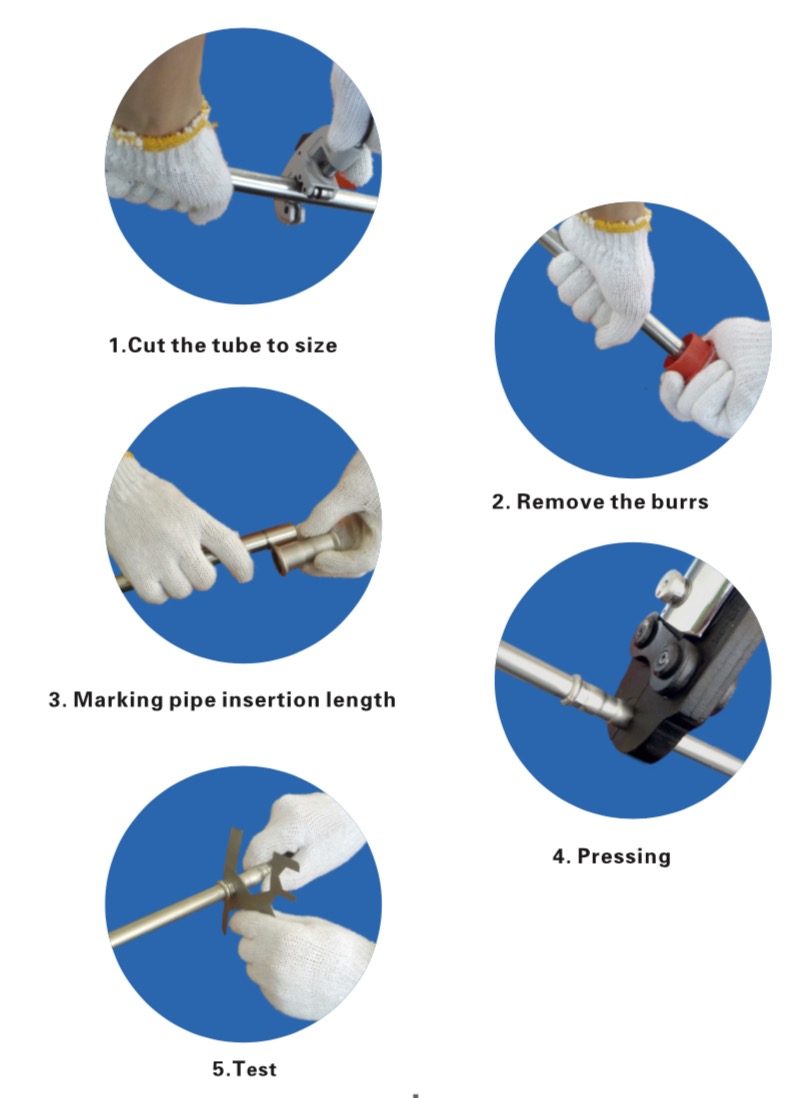
1. Cutting the pipe to size
After measuring, using a hand or electrical cutter to cut the pipes to
the length, Cut the pipes fully. No partially cutting is allowed in case
of any burrs or possible corrosion.
2. Removing the burrs
After cutting, we must remove the burrs on the pipe ends definitely,
so to avoid the possible damage to the o-rings when the pipe inserting
into the fittings.
3. Marking pipe insertion length
Use the pen to mark the length on the pipe, in order to guarantee
a safe and proper press joint and so to have corresponding tensile
strength. See the length on the bellow table 6:
Table 6 Insertion Length(mm)
|
Nominal diameter DN |
DIN |
JIS |
||
|
Pipe OD |
Insertion length |
Pipe OD |
Insertion length |
|
|
12 |
15.0 |
20 |
――― |
――― |
|
15 |
18.0 |
20 |
15.88 |
26 |
|
20 |
22.0 |
21 |
22.22 |
29 |
|
25 |
28.0 |
23 |
28.58 |
29 |
|
32 |
35.0 |
26 |
34.0 |
39 |
|
40 |
42.0 |
30 |
42.7 |
44 |
|
50 |
54.0 |
35 |
58.6 |
49 |
|
65 |
76.1 |
55 |
76.1 |
60 |
|
80 |
88.9 |
63 |
88.9 |
65 |
|
100 |
108.0 |
77 |
108.0 |
75 |
4 Inserting pipes to fittings mouth
Inserting the pipe into the fittings till the marking in an axial direction.
While the marking shall stay visible and O rings must not be displaced.
Fittings must grip pipe when pipe is held vertically
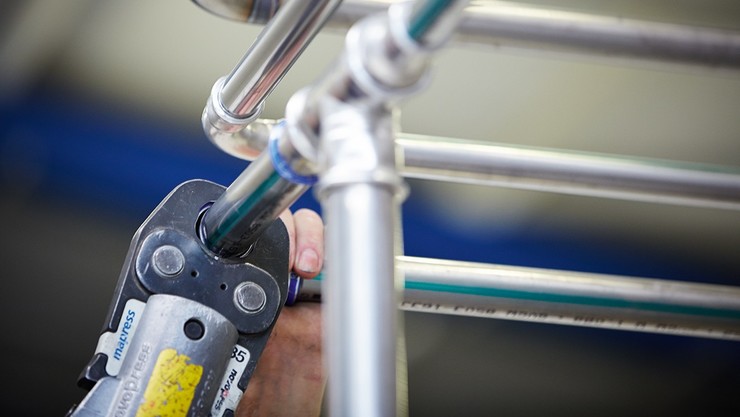
5 Pressing
Press the fittings to suitable pipe using press tools of a compatible size. Note ease of jaw removal.
When the thin-walled pipeline connects with other material pipeline, we shall use relative thread adapters to connect; if connecting with other flanged accessories, we shall use relative flanges.
When the thin-walled pipeline connects with sanitary appliance or equipment, choose the right female or male connectors.
As the tolerance of different material of female and male threads, check carefully. When connecting, add proper sealant, screw in the mouth by tools till 1/4 circle more after tightness, and stop screwing after sealing tight. After break or finishing, block the end or mouth of the pipe and fitting. After installation, the pipes shall be no obvious phenomenon of bending, rise and fall, and no damage on outside of pipes.
6 Testing
After connection, use the hexagon gauge to test if pressing is finished, or press again. To do pressure test after the whole pipeline are installed.
7 The method of pressure test
The water pressure of pipeline system shall be follow the regulations. The cold water pipeline pressure shall be 1.5times of the working pressure, but min0.6MPa. The hot water pressure shall be added 0.1MPa more based on the top working pressure of pipeline system. The pressure increasing time shall be no small than 10min till the test pressure, observe every joint, any penetration or leakage is not allowed, and the pressure change shall be no more than 0.02MPa. After the test pressure decreases till the working pressure, the pressure shall keep stead, and no more penetration or leakage.
Flushing the pipelines
After the pipeline is qualified in pressure test, use water with speed min.1m/s to flush, till the turbidity and color of the end is same with that of the mouth.